BreezeChMS is a great CRM database that you can use to manage your church! Continue to Give has a full integration with BreezeCHMS so that any donations that happen on your Continue to Give software will automatically post to your BreezeChMS.
What Information is pushed from Continue to Give to BreezeChMS
- First and Last Name
- Fund Name
- Donation Amount
How does Continue to Give prevent duplicates inside your Breeze account?
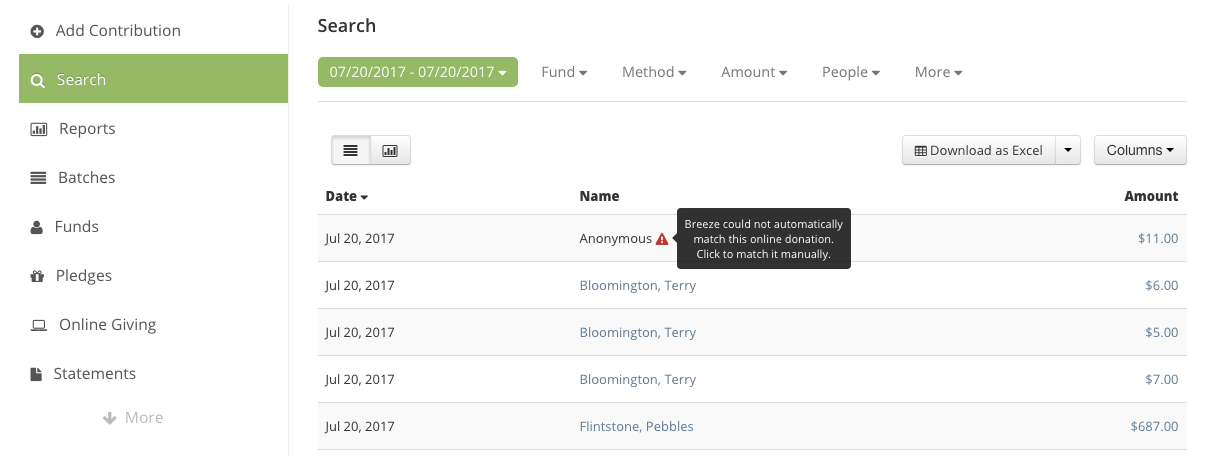
Continue to Give matches any donation by the donors first/last name and email address. If Breeze cannot find a person that matches the donation that was made it will be marked as anonymous and then you can assign it to a particular contact inside Breeze. After you assign the contact Breeze will remember your settings for that person and future donations will post to that person's profile in your Breeze account (shown later in this article).
How to Integrate Your BreezeChMS and Continue to Give Account:
Before you begin, you will need a Breeze API key and the Breeze Subdomain:
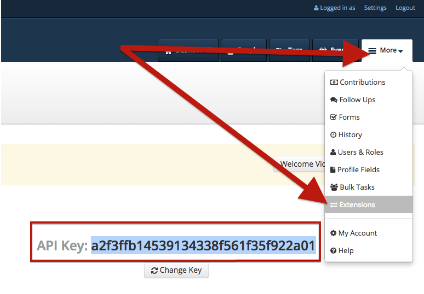
Finding the BreezeChMS API inside your Account
- Login to Breeze and select More > Extensions.
- The API key will display. Make note of it or copy paste it
in a temporary doc.
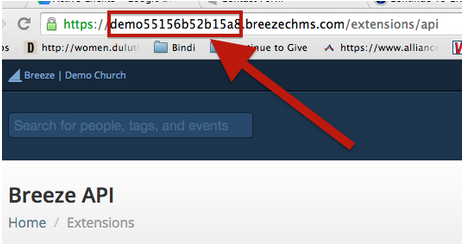
Now Locate the Subdomain
While logged into Breeze, check the URL listed in browser URL field.
The subdomain is the text between
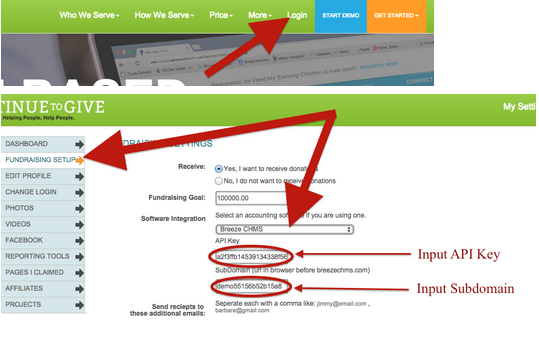
Activate the Continue to Give Integration
- Login to your Continue to Give account.
- Select Fundraising Setup in
left pane. - Select Breeze CHMS in the Software Integration dropdown field.
- Copy/paste the Breeze API and URL into the respective fields
- Save Changes.
- Once the integration is activated, configure the chart of accounts for primary and additional projects.
How to Point Donations to Specific Funds
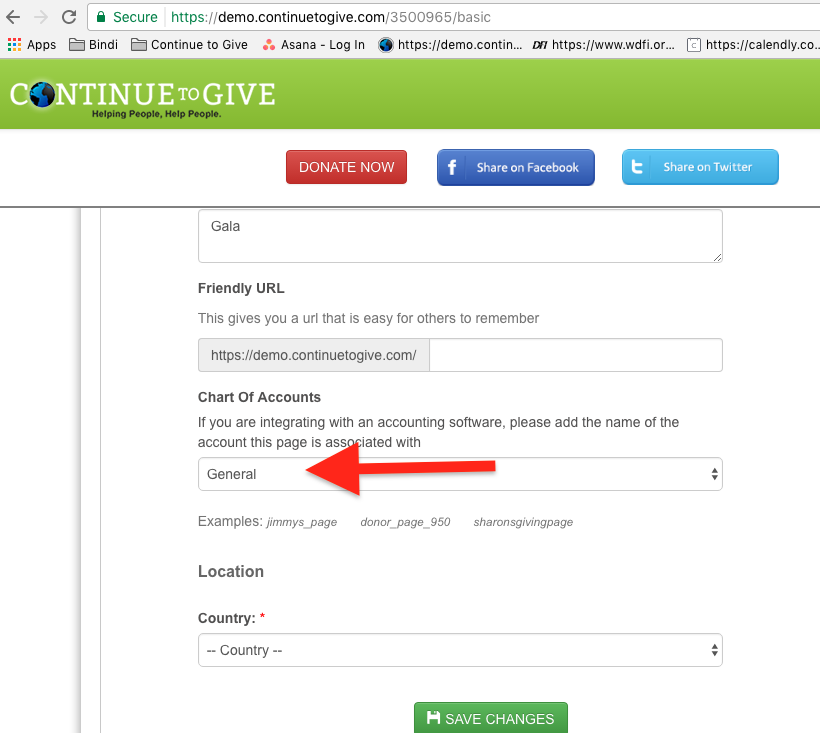
Inside Continue to Give, your givers can donate to your main organization (also known as a general donation) or they can specify a donation (also known as a project). To set main organization designation log into your Continue to Give account and go to "Edit Profile" from your left side menu. Find the Chart of Accounts (COA) section and choose from the drop down your general Fund from your Breeze account. Click save and then you are done! You had pointed general donations to post to your Breeze account in the general fund.

Adding More Designations and Funds
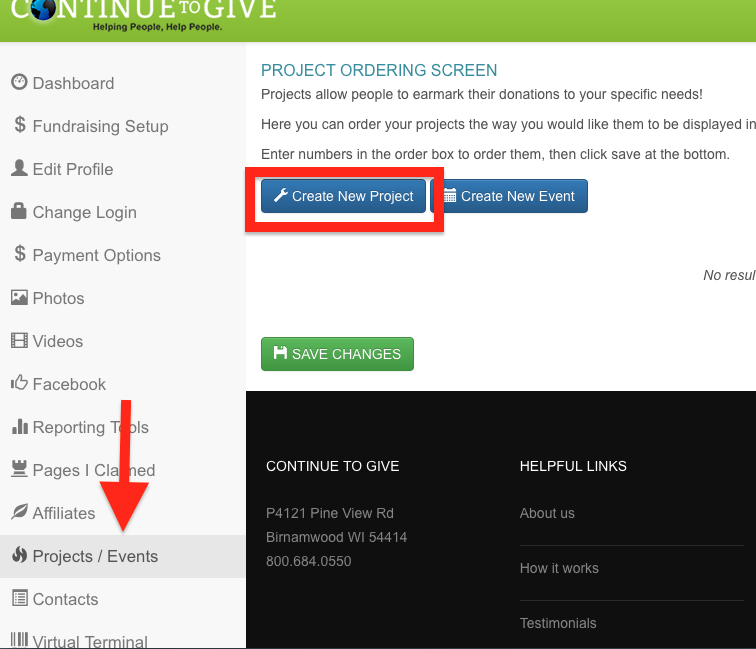
If you want donors to be able to choose from a list of designations on Continue to Give that each point separately to a Fund inside your BreezeChMS then we will have to set each up separately as projects on Continue to Give then point the project to a Fund. Let's get started: On the left click on "Projects/Events" and now create your first project!
Once you add the project name, description, and mission you are ready to point this project to a specific Fund. Scroll to the Chart of Accounts section and choose between your BreezeChMS options from the drop down. Save and you are done!
Repeat this step for each project you would like for donors to choose from.
Taking a Look in BreezeChMS
Once the donation has completed it will post into your BreezeChMS under Contributions under your More tab. From here you can click on the Search option and choose a date range and see the donations that came in and what fund they were designated to. If you have any donors that Breeze did not recognize they will be marked and then you can assign the donation to a contact inside your Breeze account. After you assign an anonymous donation it will save your settings and post under that person from then on.
If you have any questions you can reach out to our support team at customerservice@continuetogive.com!
|
Rate this Topic:
|
|||
|